
S2K Commerce - Shopping Cart
Actions
S2K Commerce - Products Dropdown
Actions
Web Content Viewer
Actions
How to Caulk a shower or bathtub
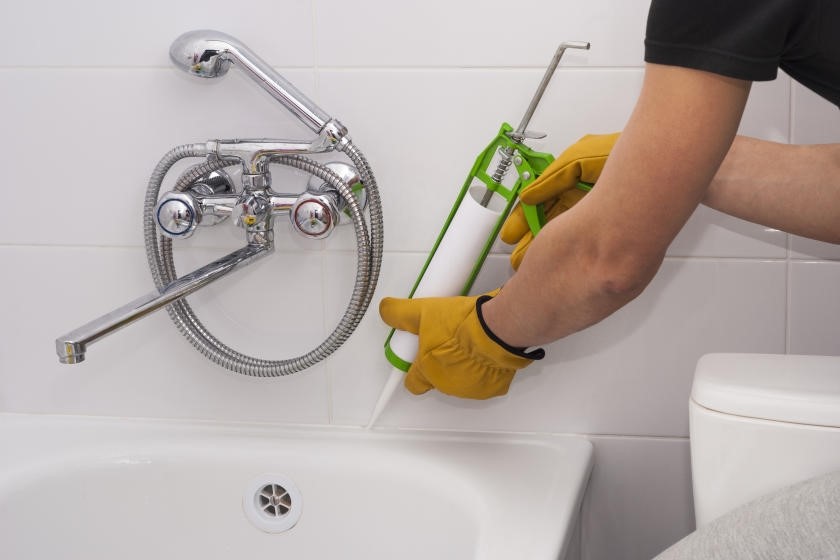
Nothing last forever. The same applies to the caulk in and around your bathtub or shower. To keep the wall, tub and tile joints sealed and watertight, at some point in time you’ll have to replace the caulk. You may think this is a job for a handyman, but in fact, it’s a task most DIYers can easily accomplish if you have the right tools and directions. These tub and shower caulking tips will help you seal the deal on a project well done.
Step 1: Remove Existing Caulk
First thing you want to do is remove the existing caulk. To remove the old caulk, use a putty knife, a utility knife, or a caulk remover tool to cut or scrape it from the joint and or, on the tub or shower wall surface. You can also use a chemical caulk remover to ease the removal process. The surfaces and the joints to be caulked need to be completely free of caulk, dirt, debris, or moisture. A dirty or imperfect surface will not hold an effective caulking job for long.
Step 2: Clean the Tub/Shower Joints
Clear the joints and adjacent surfaces of all debris, such as any remaining caulk and pieces of loose tile grout, using a shop vacuum. Then clean the areas to be caulked with a household cleaner formulated to remove mildew and mould, and a sponge or scrub brush. As caulk deteriorates, mildew and mould have an easy time getting in underneath the caulk into the joints, where it thrives. Rinse the cleaned areas with water and a rag and then dry with a towel. Go over the cleaned areas with a cloth and rubbing alcohol to remove any remaining residue. Let the area dry completely before proceeding.
Step 3: Mask the Joints
Use painter’s tape to help you achieve a more professional look with straighter lines as you mask the edges along each gap that you will be applying the caulk to. Apply the tape right along the edges on both sides of the gap. Once done, you’re all set to apply caulk.
Step 4: Apply Caulk
Start by puncturing the internal foil patch at the base of the caulk tube nozzle with a nail or other slender, sharp object. Next, cut the caulk tube nozzle. Embossed markings on a caulk nozzle determine the size of the bead that can be dispensed when the nozzle is cut at each marking. By cutting the nozzle at these different measurements, you can form a caulking bead to match your joint size. Use a utility knife to cut the nozzle at a 45-degree angle, and place it in a caulking gun.
HELPFUL TIP
It is very useful to do some test caulking on a newspaper or paper towel to get a better feel for how the caulk dispenses from the caulking gun as you move smoothly, completing one stroke of the trigger and begin the next stroke.
As you begin applying the caulk to the joint, position the nozzle opening so that it forces caulk into the joint, holding the caulking gun at a 45- to 90-degree angle. Be sure to pull the caulking tube nozzle along the joint rather than pushing it. Pulling the nozzle allows for a smooth application over any obstructions on the surface being caulked; pushing the nozzle can lead to more hang-ups and sudden breaks in the flow of the caulk, which can lead to messy blobs. Keep in mind, if you create an imperfect section of a bead, you can always scrape it out right away and start over.
As you finish applying each bead of caulk, release the trigger and pull back on the caulking gun rod to stop the flow of caulk and relieve the pressure inside the tube. Releasing the trigger alone will not stop the caulk from flowing out of the nozzle. Wipe the excess caulk that has escaped from the nozzle with a rag before continuing. Only apply about 2’ to 3’ of caulk at a time. This will allow you enough time to get it “tooled” before it begins to skin over and harden (which can make tooling very difficult or even impossible). Dried caulk is much more difficult to clean than wet caulk, so keep rags available to clean up any spills or problem areas right away.
Step 5: Smooth the Caulk and Finish Up
Tool the bead after applying each section of caulk, you need to ensure proper adhesion and good-looking results. Tooling is the process of smoothing over the applied bead of caulk, which also forces it into the joint to establish good adhesion. Depending on the type of caulk being used, tooling can be done with a latex glove-covered finger (wetted with some water or solvent), a caulk finishing tool, or the tip of an old spoon. When tooling, take care to avoid removing too much caulk from the joint. Lightly smooth the bead when using your finger or tool in one continuous motion to give it a concaved appearance in the joint.
Make sure the painter’s tape is removed immediately after tooling is complete and before the caulk completely skins over so that it will pull away cleanly, leaving the caulk intact and neat.
Great work! Your tub / shower is now watertight and looking crisp and clean
Source: True Value


